Wednesday, January 2, 2013

Parts, Money, and Back to the Drawing Board

After browsing through tutorials and online robotics forums, I began to understand what parts I needed and exactly what they do. However, I will let you know right now, these parts are not necessarily cheap. They can range anywhere from $5-$40 depending on where you look, so it is important to research them and find them in the right spots. 

My parts list so far includes:
R/C Car or Truck
Arduino Uno Rev 3 ($35)
Arduino Motor Shield ($30)
HC-SRo4 Ultrasonic Sensor ($5 off ebay)
Heavy Duty 9V Snap Connectors ($3)
Size M Coaxial DC Power Plug ($2)
Multipurpose PC Board with $17 Holes ($3)
90ft Ul-Recognized Hookup Wire]
Alkaline 9V Battery ($4)
6" Heat-Shrink Tubing
5-1/2" Zipties

Once you know which parts you will most likely need, or which ones you can do without, go back to the drawing board again and rethink your designs. Try and incorporate the parts as well as possible. In fact, it doesn't hurt to do even a bit more research at this stage if you're a beginner. Feel free to watch tutorials or browse DIY forums (with your parents permission) to see how other people's robots are coming together. If you get confused on them, don't worry we will have a step by step process as I create my robot soon.

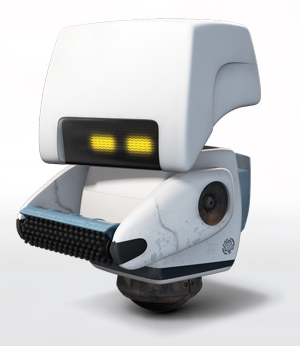
Here is an example of my re-imagined design:


You will notice I scrapped the Wall-e floor cleaner bot design for one that is more centered around the frame of a r/c car or truck. For reference: http://www.instructables.com/id/RC-Car-to-Robot/

Get Crackin'!

Alright, so once you have researched for your robot, and spent several hours wondering how exactly they fit a little person inside r2d2, hopefully you have found a task you want your robot to accomplish. Mine for example, and feel free to use it, is a floor cleaning robot. My designs and ideas were influenced by the Roomba floor cleaner, and M-O from Wall-e. Even though I didn't know what parts I needed yet, I decided to get my ideas out there to see what would fly and what wouldn't. Just get the creative juices flowing, and we'll get to parts in just a bit.
So go ahead and draw. My first designs were extremely simple, giving me a lot of room to improve and become more specific. 

Note: If you are doing this to earn the merit badge be sure to secure these designs in you Robot Engineering Notebook.

Here are some examples of my beginning designs:


As you can see, my basic designs were greatly influenced by M-O, the cleaner bot, from Wall-e (below).

The Design Process

So you've considered pursuing the Robotics Merit Badge, eh? Or you're just wanting to build a robot for fun? Well either way this first step into creating your robot is extremely important. This is the design process. Now if you're a first time robot builder (it's okay, so am I) then you'll have to do some research first. The Robotics Merit Badge requirements state that the robot must accomplish a certain task, use sensors, and require programming, and have 2 degrees of motion, so these requirements will greatly narrow your field of research. An example of a degree of motion would be: forwards, backwards, up, down, left, right, and if you're creating a wanka-vator then you could use slantways, backways, and any possible way you can think of. However, I'm not daring enough to build that one, so instead i'll be sticking with the basic forward, backward, left, and right.

In order to find the robot I wanted to create, I browsed the web looking up robot tutorials, robot competition videos, and various pictures of r2d2 and wall-e (no joke, it gets the creative mind up and running). I found two websites to be extremely helpful in my research and design process. The first of which is a DIY website called instructables, and the second was Radio Shack's website for their Great Create. Both of these websites influenced me in different ways, as well as help guide me through selecting the parts I need.

The first website, Instructables, is extremely helpful and I strongly recommend using it. I found a good tutorial on how to make a clusterbot out of various parts, however it is a bit expensive. You can find the tutorial here:
http://www.instructables.com/id/Clusterbot/

The second website, The Great Create, was also extremely helpful too, and it was there that I found a link to the tutorial I mainly based my project off of. You can find it here:
http://www.instructables.com/id/RC-Car-to-Robot/

I will post my various design pictures in the next post.
Thankyou.

An Introduction

Hello, and welcome to this blog. 

Throughout my postings I will be giving a tutorial on how to build a M-O (Merit badge-Obtaining) robot for the newly added Robotics Merit Badge. The new merit badge requires a scout to design, build, and test a task accomplishing robot. The full list of requirements can be found here. While this newly added merit badge may sound quick and easy, its actually quite the contrary. However, this is not to say that the merit badge is still not a fun one to achieve. I encourage most scouts to pursue this badge, because it is really a fun and great experience to have under the belt, and it should look pretty cool on any sash. I will hopefully begin posting the tutorials soon, I just have some shopping for parts to do first.